
Just joining in? Here's what you've missed:
Photography 101 | Coming Soon!
Photography 101 | Aperture
Photography 101 | Shutter Speed
Photography 101 | ISO
Photography 101 | Exposure Meter
Photography 101 | Depth of Field
Welcome back to my Photography 101 series! I'm so glad that you have decided to join me. Today the fun continues, as we learn about capturing motion in photographs.
Last week I talked about how you can have more creative control over your photos by learning how to change the depth of field. Another way that you can exert creative control over your images is to learn how to show motion in your photos. There are two main ways you can show motion in your photos:
Freezing the motion of your subject in mid-action, like I've done in this photo...

Or intentionally blurring the motion of your subject, like I've done in this photo...

By learning how to capture motion in different ways, you can create different types of images that will evoke different responses. Do you want to show the force behind the waterfall as the water crashes over the edge in sharp detail? Or do you want to show the serenity in the waterfall by turning it into a peaceful stream of flowing water? The choice is yours once you learn how to create these different types of motion in your photos!
The key to creating motion in your photos is learning how to use different shutter speed settings to either freeze or blur objects that are in motion. The first image above was taken using a shutter speed of 1/4000 and the second image above was taken using a shutter speed of 1/5. Both were taken while my camera was on a tripod, using the timer feature on my camera.
Freezing Motion
- faster shutter speed = less blur of moving subject
- slower shutter speed = more blur of moving subject
Below are several examples of instances where I have chosen to photograph the object in motion by freezing the action. Above each of the images I've listed the shutter speed I used to take the photo. As you can clearly see, there is a large range of shutter speeds represented, meaning that there isn't one specific shutter speed you can use to capture every type of motion. I really wish there was a hard and fast rule I could share about how to pick the proper shutter speed to freeze motion, but the truth is that it just takes practice. The more you experiment, the better you will get at predicting what settings will give you the results you desire...
1/200

1/350

1/800

1/800

1/800

1/2000

1/2500

1/4000

Blurring Motion
- faster shutter speed = less blur of moving subject
- slower shutter speed = more blur of moving subject
Again, a faster shutter speed is going to freeze motion and a slower shutter speed is going to blur motion. So if you want to show motion in your photos by intentionally blurring moving subjects, you are going to have to use a slower shutter speed.
When creating intentional blur the big question you need to ask yourself is, what part of your photograph do you want to blur?
Or do you want to keep the moving object in focus, and show the background as a blur?...
1/30

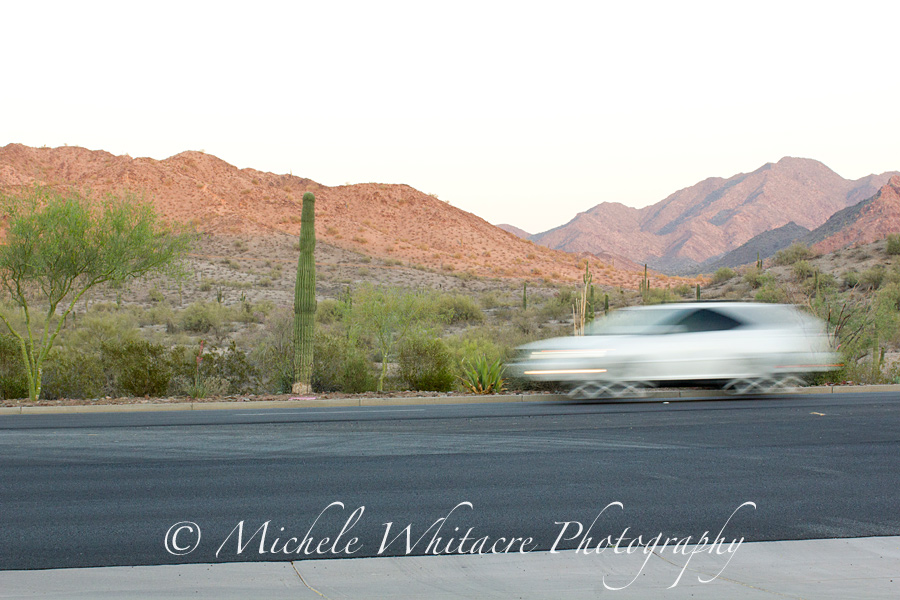
Or do you want to show the object in motion as the portion of your photograph that is a blur, while the background is in focus?...
1/20
And if you want the object in motion to be the portion that is blurred, how blurry do you want it to be?...
1/10

The first photo above was taken using a method called panning. In panning, you focus on the moving object and follow the path of motion with your camera while taking the photo using a slow shutter speed. The second two photos were both taken with my camera on a tripod, and my focus set for the background. As the cars went by, I took the photos with slow shutter speeds. I opted to vary the shutter speed between the bottom two photos to show the difference in the amount of blur created by the different settings.
Since freezing motion requires fast shutter speeds, it is usually fairly easy to create those photos while hand holding your camera. However, intentionally blurring motion often requires shutter speeds that are too slow to capture without using a tripod. There is a limit to how slow of a shutter speed you can use and still hold your camera steady. The general rule is that the focal length of your lens is about equivalent to the shutter speed you can use without inducing unintentional blur. For example, for a 50 mm lens, you can hand hold the camera at about 1/50; for a 200 mm lens, you can hand hold the camera at about 1/200; etc. This is because the longer the focal length of the lens, the more the lens magnifies things - including motion of the camera while you are taking the photograph. However, every photographer is different, and as you practice you will learn your own personal limits. Also, unintentional blur can be caused by simply pushing the shutter button to take the photo. For this reason, it is sometimes useful to use a remote control or to set the self-timer on your camera to trigger the shutter button without having to touch the camera.
With that being said, sometimes you can create some really fun abstract images by intentionally moving your camera while photographing every day objects. Take a look at this photo that I took of some rocks while moving my camera at a slow shutter speed. Kinda fun, right?...
1/50

Here are just a few more examples of images where the object in motion was intentionally blurred. Both of these images were taken with a hand held camera...
1/100

1/500

There is one more thing to keep in mind while capturing intentional blur in your photographs: the lens to subject distance and the focal length of your lens will also affect the amount of blur in your photo. If your subject is closer to your lens, or if it is magnified using a longer lens, it doesn't have to move as much to cross enough of the plane of the photo to result in blur on the image. Conversely, if your subject is farther from your lens, or isn't being magnified, it will have to move a greater amount to cross enough of the plane of the photo to result in blur on the image.
Now it's your turn! Grab your camera and head on out to capture your own motion photos. Then join me back next week, to put it all together! I'm going to teach you to think like a pro, as I share with you the thought process I go through for each image I take to determine which settings to select.
Michele Whitacre is a portrait photographer serving Phoenix, Arizona and the surrounding area. Visit Michele's website at michelewhitacrephotography.com. Become a fan of Michele's work on Facebook. Follow Michele's updates on Twitter.
No comments:
Post a Comment