Monday, April 30, 2012

Self-Portrait | April 2012

April's self-portrait was once again taken at our rental house in Phoenix, and it is obviously a photo of my feet while I am relaxing in a bubble bath. The irony of this photo is rather amusing to me, as 10-15 years ago I NEVER would have posted this photo for the world to see. I never would have even taken the photo! I used to be so self-conscious of my feet that I refused to wear anything but closed toe shoes. Obviously a lot has changed over the years, but I supposed that is to be expected. One of the great things about getting older is that most of us learn to accept ourselves more as time goes on.

I chose this as my photo for the month for a couple of reasons. First, it is impossible for me to look at my purple painted toes with the cute flowers without smiling and feeling happy, and April has been all about happiness for me! I started a new day job at the beginning of the month that I am really liking, and I opened my shooting schedule up and began booking a few sessions. I also decided to go back to working my day job 4 days a week, which has brought a balance back into my life that has been missing for a very long time. I finally feel like my life is back in a good place. Second, a large part of my month has been consumed with planning the details of a trip we are taking to Hawaii, and the flowers on my toes reminds me of the flowers found in tropical places. So the photo also represents all the plans I've been making for my upcoming vacation.


I will admit that this month's photo was nice and easy to take since I could just hold the camera and shoot, but I spent the entire time terrified that I was going to drop my camera into the water. I had a death grip on it the entire time!

Did you miss some of my past self-portraits?  Clicking here will take you to all of my self-portrait blog posts. Clicking here will take you to my self-portrait Facebook album.

Michele Whitacre is a portrait photographer serving Phoenix, Arizona and the surrounding area. Visit Michele's website at michelewhitacrephotography.com. Become a fan of Michele's work on Facebook. Follow Michele's updates on Twitter.

Friday, April 27, 2012

Photography 101 | Think Like a Pro


Just joining in? Here's what you've missed:
Photography 101 | Coming Soon!
Photography 101 | Aperture
Photography 101 | Shutter Speed
Photography 101 | ISO
Photography 101 | Exposure Meter
Photography 101 | Depth of Field
Photography 101 | Motion

Welcome back to my Photography 101 series! I'm so glad that you have decided to join me.

You may remember from the discussion about your camera's exposure meter that there are several different combinations of aperture, shutter speed, and ISO that will create a properly exposed photograph, so how do you know which combination to select?

That's what I'm hoping to help you figure out with today's post!  It's time to put together everything we have discussed over the past 6 weeks, and learn how to think like a pro!

What I am going to share with you today is the process that got me started with learning how to select my camera settings.  I'm not claiming that this way is the only way, or even the best way, to take photos, nor is it the way that I use today, but I do think it is a good place to begin as you develop the method that works best for you.  Mainly, I'm hoping it will help you to recognize the questions you need to ask yourself as you prepare to create your own amazing photos.

When I first started shooting, I always did so with my camera in full manual mode.  The exception being that I almost always left my ISO set to auto.  This doesn't mean that I just let the camera select the ISO for me.  Instead, I would allow the camera to adjust the ISO as I adjusted the aperture and shutter speed, and then I'd evaluate the camera's selection.  I felt like it was less overwhelming during the learning process to control two settings instead of three.  Now that I have more experience, I no longer use auto ISO.  However, I still think using the auto ISO setting is a great tool as you get started, and have included it the process description below.

It took me a long time to figure out just how to write this post!  Usually I am doing many of these things simultaneously as I'm adjusting my settings, so it was rather difficult to detail a thought process in linear form in writing.  This was what I came up with, and I really hope that it is straight forward enough to make sense!

Below is the series of questions and considerations that I ask myself as I prepare to take each of the photos that I create:

1. The very first thing I do is ask myself, is the subject in motion?
  • Yes - Continue to Step 2
  • No - Skip to Step 6

2. What do I want to do with this motion?
  • Freeze it - Continue to Step 3
  • Intentionally blur it - Skip to Step 4

3.  Any time the subject is in motion, my first priority is going to be to select the shutter speed I want to use.  If my goal is to freeze the motion of my subject, I am going to select a fairly fast shutter speed.
  • Select my best estimated shutter speed - Skip to Step 5

4.  Any time the subject is in motion, my first priority is going to be to select the shutter speed I want to use.  If my goal is to intentionally blur my subject, I am going to select a fairly slow shutter speed (which may require a tripod).
  • Select my best estimated shutter speed - Continue to Step 5

5.  Once I have selected the shutter speed that I think will show the motion the way I want, I ask myself how large I want the depth of field to be (or how much of the scene do I want in focus)?
  • Small depth of field - Select a large aperture opening and continue to Step 8
  • Large depth of field - Select a small aperture opening and continue to Step 8

6. If my subject isn't in motion, my first priority is going to be to choose my aperture setting. To do that I ask myself, how large do I want the depth of field to be (or how much of the scene do I want in focus)?
  • Small depth of field - Select a large aperture opening and continue to Step 7
  • Large depth of field - Select a small aperture opening and continue to Step 7

7.  Once I have selected the aperture that I think will provide the depth of field that I want, I ask myself what shutter speed should I select?  To be honest, the shutter speed really isn't all that critical as long as it will allow for a proper exposure of the image and is fast enough to prevent me from moving the camera while taking the photo.   If I'm shooting with a tripod, then I can pick even slower shutter speeds if I want.
  • Select the shutter speed, and continue to Step 8

8.  After I have selected the shutter speed and aperture settings that I think I want to use, I do two things:
  • I look at my exposure meter to ensure that it is showing a proper exposure.  If the exposure meter is showing me that my exposure is going to be off, I start back at the beginning and re-ealuate my selections to compensate for what the exposure meter is telling me
  • If the meter is showing a negative reading (underexposed photo), I will open up my aperture, slow my shutter speed, or both. 
  • If the meter is showing a positive reading (overexposed photo), I will close down my aperture, increase my shutter speed, or both.
  • I consider my ISO setting.  Since I leave the ISO set to auto, the camera will have automatically selected an ISO setting to match the combination of the other two settings I selected to create a properly exposed photograph.  Personally, I opt to keep my ISO setting between 100 - 800 because my particular camera doesn't do well at high ISO levels.  If I shoot a photo using ISO 1600 or greater, I'm going to end up with noise in my photo.  This may or may not be an issue, depending on what I want to use the photo for, so I usually just try to avoid the higher ISO settings.
  • ISO between 100 - 800 - take the photo
  • ISO 1600 or greater  - Continue to Step 9
9. If my ISO setting with my first choice of shutter speed and aperture settings is 1600 or above, I have a choice to make: I can re-evalaute my settings and see if maybe I can slow my shutter speed slightly or open my aperture slightly to increase the light entering my camera, which will let me decrease the ISO. If I think this will still allow me to capture the image that I want to create, I will modify the settings.  If I think changing the settings will sacrifice the image or if lighting conditions won't allow me to change the settings, I opt to take the photo and live with the possible noise.

And there you have it!  I know that is probably a lot to take in!  I'm going to let you digest all of this information over the coming week and begin practicing with it if you would like, and I will return next week with an example or two.

Michele Whitacre is a portrait photographer serving Phoenix, Arizona and the surrounding area. Visit Michele's website at michelewhitacrephotography.com. Become a fan of Michele's work on Facebook. Follow Michele's updates on Twitter.

Tuesday, April 24, 2012

BBL 2011-2012 | Take a Photoshop Class


#10 TAKE A PHOTOSHOP CLASS

Why did I include this on my Bucket List?

I included this because everything I know about Photoshop, I have learned from reading books or watching tutorials online. I wanted to see if I could pick up any tips about new and/or easier ways to do things from a real, live instructor. Also, I wanted to see if I could learn about some of the features of photoshop that I don't currently use.

Was the experience what I had hoped it would be?

I feel like the class covered a lot of great material, but it was at such a fast pace that a lot of it didn't really sink in. So, when I went back to use it, I couldn't remember how to do some of the things I had learned.

The details...

I actually took this class a month ago! The fact that I'm just now posting about it is a tribute to how crazy busy this past month has been for me. I decided to take the class because it showed up in my inbox from Groupon for a ridiculously good price. It was a beginner class, so I expected it to be a mix of review of things I already knew how to do and an introduction to some new things.  It was interesting to see that the instructor had a completely different way of doing a lot of the edits that I routinely do on photos. I'm looking forward to trying some of his ways of doing the edits on some up coming photo sessions to see if I like them better.

Just for fun, (and because I didn't feel right about not posting any photos) I thought I'd share a handful of different edits I did in Photoshop on one of Elle's photos when I was finishing up editing her session a few days ago.

When I edit photos, I edit each one individually to best enhance each photo.  Sometimes, I will try a handful of different edits before deciding on the one for the final image.  Yes, this does make it more time consuming to edit the photos!  But, I am a bit of a perfectionist and I feel better knowing that I took the time to view and edit each photo to make it the best it can be.

If you've never seen Photoshop in action before, get ready to be shocked by what it can do! So many of the things that look so amazing in photos these days are actually edited in using photoshop.

OK, so here is the original photo, which, if we are going to be honest, isn't all that exciting.  But I felt like it had potential so I decide to work with it a bit and see if I came up with anything I liked...


Here it is after desaturating the colors, which helps, but it's still not quite right....


From the moment I saw it, I really felt like this photo would be best in black and white...


The above photo is the one that I presented to Elle with her final images because it is a bit more of a "classic" photo. But, from a personal stand point I wasn't quite satisfied with it yet and decided to keep working with it. I'm usually not a fan of grainy photos, but this one just called out to me for more of a gritty feel, so I decided to give it a try...


I tried different amounts of grain on the above photo, but never really found the perfect amount. Since I don't use it all that often, I will be the first to admit that I don't have a real good feel for the perfect combination of the settings. However, no matter how much grain I put on the photo, I felt like it didn't work with the bright white of the pearls. So on this next photo, I decided to add some blur to the photo to take some of the focus off of the necklace and add to the gritty feel of the photo. I knew I wasn't going to do anything with this photo other than amuse myself and perhaps add it to this post, so it isn't a perfect edit. The blurring is perhaps a bit too much, but I think it gets my point across of the endless ways each individual photo can be edited in Photoshop...


So, which photo is your favorite? I'd love to hear your thoughts!

Do you want to see my entire 2011-2012 Bucket List? You can find it here.

Michele Whitacre is a portrait photographer serving Phoenix, Arizona and the surrounding area. Visit Michele's website at michelewhitacrephotography.com. Become a fan of Michele's work on Facebook. Follow Michele's updates on Twitter.

Friday, April 20, 2012

Photography 101 | Motion


Just joining in? Here's what you've missed:
Photography 101 | Coming Soon!
Photography 101 | Aperture
Photography 101 | Shutter Speed
Photography 101 | ISO
Photography 101 | Exposure Meter
Photography 101 | Depth of Field

Welcome back to my Photography 101 series! I'm so glad that you have decided to join me. Today the fun continues, as we learn about capturing motion in photographs.

Last week I talked about how you can have more creative control over your photos by learning how to change the depth of field. Another way that you can exert creative control over your images is to learn how to show motion in your photos. There are two main ways you can show motion in your photos:

Freezing the motion of your subject in mid-action, like I've done in this photo...


Or intentionally blurring the motion of your subject, like I've done in this photo...


By learning how to capture motion in different ways, you can create different types of images that will evoke different responses.  Do you want to show the force behind the waterfall as the water crashes over the edge in sharp detail? Or do you want to show the serenity in the waterfall by turning it into a peaceful stream of flowing water?  The choice is yours once you learn how to create these different types of motion in your photos!

The key to creating motion in your photos is learning how to use different shutter speed settings to either freeze or blur objects that are in motion.  The first image above was taken using a shutter speed of 1/4000 and the second image above was taken using a shutter speed of 1/5.  Both were taken while my camera was on a tripod, using the timer feature on my camera.

Freezing Motion
  • faster shutter speed = less blur of moving subject
  • slower shutter speed = more blur of moving subject
In general, a faster shutter speed is going to freeze motion and a slower shutter speed is going to blur motion.  However, the definition of "fast" and "slow" shutter speed is relative to the subject that you are photographing.  Consider a car driving down the road and a person walking down the sidewalk - it is going to take a much faster shutter speed to freeze the motion of the car compared to the person.

Below are several examples of instances where I have chosen to photograph the object in motion by freezing the action. Above each of the images I've listed the shutter speed I used to take the photo.  As you can clearly see, there is a large range of shutter speeds represented, meaning that there isn't one specific shutter speed you can use to capture every type of motion. I really wish there was a hard and fast rule I could share about how to pick the proper shutter speed to freeze motion, but the truth is that it just takes practice. The more you experiment, the better you will get at predicting what settings will give you the results you desire...

1/200

1/350

1/800

1/800

1/800

1/2000

1/2500

1/4000

Blurring Motion
  • faster shutter speed = less blur of moving subject
  • slower shutter speed = more blur of moving subject

Again, a faster shutter speed is going to freeze motion and a slower shutter speed is going to blur motion. So if you want to show motion in your photos by intentionally blurring moving subjects, you are going to have to use a slower shutter speed.

When creating intentional blur the big question you need to ask yourself is, what part of your photograph do you want to blur?

Or do you want to keep the moving object in focus, and show the background as a blur?...

1/30

Or do you want to show the object in motion as the portion of your photograph that is a blur, while the background is in focus?...

1/20

And if you want the object in motion to be the portion that is blurred, how blurry do you want it to be?...

1/10

The first photo above was taken using a method called panning. In panning, you focus on the moving object and follow the path of motion with your camera while taking the photo using a slow shutter speed. The second two photos were both taken with my camera on a tripod, and my focus set for the background. As the cars went by, I took the photos with slow shutter speeds. I opted to vary the shutter speed between the bottom two photos to show the difference in the amount of blur created by the different settings.

Since freezing motion requires fast shutter speeds, it is usually fairly easy to create those photos while hand holding your camera. However, intentionally blurring motion often requires shutter speeds that are too slow to capture without using a tripod. There is a limit to how slow of a shutter speed you can use and still hold your camera steady.  The general rule is that the focal length of your lens is about equivalent to the shutter speed you can use without inducing unintentional blur.  For example, for a 50 mm lens, you can hand hold the camera at about 1/50; for a 200 mm lens, you can hand hold the camera at about 1/200; etc.  This is because the longer the focal length of the lens, the more the lens magnifies things - including motion of the camera while you are taking the photograph.  However, every photographer is different, and as you practice you will learn your own personal limits.  Also, unintentional blur can be caused by simply pushing the shutter button to take the photo.  For this reason, it is sometimes useful to use a remote control or to set the self-timer on your camera to trigger the shutter button without having to touch the camera.

With that being said, sometimes you can create some really fun abstract images by intentionally moving your camera while photographing every day objects. Take a look at this photo that I took of some rocks while moving my camera at a slow shutter speed. Kinda fun, right?...

1/50

Here are just a few more examples of images where the object in motion was intentionally blurred. Both of these images were taken with a hand held camera...

1/100

1/500

There is one more thing to keep in mind while capturing intentional blur in your photographs: the lens to subject distance and the focal length of your lens will also affect the amount of blur in your photo.  If your subject is closer to your lens, or if it is magnified using a longer lens, it doesn't have to move as much to cross enough of the plane of the photo to result in blur on the image.  Conversely, if your subject is farther from your lens, or isn't being magnified, it will have to move a greater amount to cross enough of the plane of the photo to result in blur on the image.

Now it's your turn! Grab your camera and head on out to capture your own motion photos. Then join me back next week, to put it all together! I'm going to teach you to think like a pro, as I share with you the thought process I go through for each image I take to determine which settings to select.

Michele Whitacre is a portrait photographer serving Phoenix, Arizona and the surrounding area. Visit Michele's website at michelewhitacrephotography.com. Become a fan of Michele's work on Facebook. Follow Michele's updates on Twitter.

Thursday, April 19, 2012

Denny + June's Sneak Peek

A few months ago, my mom asked if I would take some new photos of her for Facebook, and of course I said yes. So, we decided on a photo session while she is in Phoenix for a few weeks this winter. My dad doesn't love having his photo taken, so I was really surprised when he decided to join my mom for the photos. But, I'm glad that he did! It was nice to take photos of both of them.

These photos were taken near Estrella Mountain, and the area was GORGEOUS!

This was one of the first photos we took, and it's one of my favorites...


My mom doesn't love black and white photos.  She says she lived through the time when there was no choice, and now that things come in color, she wants them in color.  So, I tried to keep the black and whites to a minimum, but I couldn't resist a black and white edit on this one...


The yellow/orange in this one was a huge round structure outside of a building.  It made a fun background for a few photos...


When I was a kid, I was always told that I look just like my dad, but as I get older I hear that I look more like my mom.  What do you think?...


Love their poses.  I think they look too cute! :)...


Gorgeous view, huh?...


One of just my dad...


It looks like they are in Florida, not Arizona, with the water and palm trees, doesn't it?...


I really like this one, too!...


My mom requested this one!  I have an engagement photo of Kevin and I in a pose very similar to this...


A little of the stunning Phoenix landscape...


And just my mom...


I think this one is my favorite from the session!  I love that they both look relaxed and happy...


Thanks to my parents for letting me take their photos! I hope I didn't torture you too much during the session, and you'll let me take more pictures of you in the future. :)

Michele Whitacre is a portrait photographer serving Phoenix, Arizona and the surrounding area. Visit Michele's website at michelewhitacrephotography.com. Become a fan of Michele's work on Facebook. Follow Michele's updates on Twitter.

Friday, April 13, 2012

Photography 101 | Depth of Field


Just joining in? Here's what you've missed:
Photography 101 | Coming Soon!
Photography 101 | Aperture
Photography 101 | Shutter Speed
Photography 101 | ISO
Photography 101 | Exposure Meter

Welcome back to my Photography 101 series! I'm so glad that you have decided to join me. Today the fun begins, as we learn about depth of field (DOF).

If all you wanted was to have properly exposed photos, you could just set your camera on automatic and most of the time your camera would do just fine. If you are taking the time to learn how to use your camera in manual mode, I’m guessing you want to have more creative control over your photos, and a large part of this control comes from understanding depth of field and how to use it in your images.

Depth of field is essentially the portion of your photograph that is in focus. You can use depth of field to isolate your subject from the background by keeping it in focus and making the background out of focus, like I’ve done in this photo…


Or you can use depth of field to keep your entire scene in focus, like I’ve done in this photo…


By learning how to control depth of field, you can choose what to focus on and decide how much of each photo will be in focus. To demonstrate this idea, the next series of photographs are photos I took during my Intro to Photography class, when I was first learning about depth of field. The instructions were to take four photographs of the same scene. In the first photo we were supposed to focus on the foreground, and blur the rest of the image. In the second photo we were supposed to focus on the middle ground, and blur the rest of the image. In the third photo we were supposed to focus on the background, and blur the rest of the image. In the fourth photo we were supposed to keep the entire scene in focus. I wasn't using a tripod, so my scene isn't exactly the same from one image to the next, but it still demonstrates the point...


So, let's talk about how how you can control the depth of field in your photos. There are 3 things that affect depth of field: lens aperture size, lens to subject distance, and lens focal length.

Lens Aperture Size
  • larger aperture size = smaller depth of field
  • smaller aperture size = larger depth of field
As you increase the size of the lens aperture, the depth of field gets smaller resulting in a smaller portion of your photo being in focus.  The flower photo above was taken with an aperture of f/2.8, and the first three photos in the DOF series were taken with an aperture of f/4.

As you decrease the size of the lens aperture, the depth of field gets larger resulting in a larger portion of your photo being in focus.  The mountain photo above was taken with an aperture of f/18, and the final photo in the DOF series was taken with an aperture of f/22.

Changing the size of the lens aperture is the only way to change the depth of field without changing the composition of your photo.  For this reason, lens aperture size is the first thing that I use to control the depth of field when I shoot.

As you can plainly see, the composition of the following two photos is roughly the same, even though what is in focus varies greatly between them.  The first image was taken at an aperture size of f/2.8 and the second at f/11.  As I decreased the size of the aperture I caused the depth of field to increase resulting in an increase in the the amount of the scene that is in focus.


You will notice in the first photo above that the yellow flower is in focus as well as the edge of the leaf down near the left corner of the image.  The reason these two things are in focus as the same time is because they are both in the same plane (or in other words they are both the same distance from the camera lens).  This becomes important when you are shooting portraits and trying to get multiple people in focus at once.

For example, take at a look at the image below, where I was trying to take a photograph of Lexi and Zoe.  I couldn't quite convince them to lay right next to each other, so Zoe was slightly farther away from my camera lens than Lexi was.  My lens aperture was set at f/2.8 which resulted in a depth of field too small for both of them to be in focus at the same time.  I was focusing on Lexi, and Zoe ended up out of focus.


While I prefer to adjust my depth of field using my aperture size, there are times when lighting conditions will not allow me to use my first choice for lens aperture size.  In those instances, one or both of the next two things will help me to achieve the depth of field results that I want for my photo.

Lens to Subject Distance
  • shorter lens to subject distance = smaller depth of field
  • longer lens to subject distance = larger depth of field
(As a side note, this also changes perspective, which I will talk about in a future post.)

Lens to subject distance is easy to change unless you are shooting in a confined space.  If you want to decrease the depth of field in your photo, move closer to your subject.  If you want to increase the depth of field in your photo, move farther away from your subject.  But keep in mind that as you move closer to or farther away from your subject you are going to be changing the composition of your photo.

I took this first photo, and then backed up about 5 ft and took the second one. You can plainly see the difference in how out of focus the back branch is between the two photos. By lengthening the distance between my camera lens and my subject, I made the depth of field get larger. I also changed the composition of my photo rather drastically.


Lens Focal Length
  • longer focal length = smaller depth of field
  • shorter focal length = larger depth of field
Lens focal length is usually the last thing I use to control the depth of field in my photos.  I don't always carry all of my lenses with me when I am out shooting, plus changing lenses can be difficult and time consuming depending on the circumstances.  So, I usually try to get the shot with the lens that is already attached to my camera body.  However, this can come in handy when I am using a zoom lens and have a range of focal lengths readily available. Again, changing the depth of field by changing the lens focal length will also change the composition of your photo.

The following three photos were taken using my 70-200 zoom lens.  The first photo was taken at a lens focal length of 170 mm, the second photo was taken using a lens focal length of 115 mm, and the third photo was taken using a lens focal length of 70 mm.  As I shortened the focal length, the depth of field increased for each photo resulting in more of the scene being in focus for each subsequent image.  Of course, the composition for each photo was changed, as well.


(Depth of field is also affected by the size of your camera's sensor.  However, you do not have control over this, with the exception of purchasing a new camera with a different sensor size, so I am opting not to discuss it in detail.)

One other thing to keep in mind is that the farther away something is from the subject you are focusing on, the more out of focus it will be. So, if you want to decrease the focus of the background behind your subject, you can simply move your subject farther away from whatever is behind it.

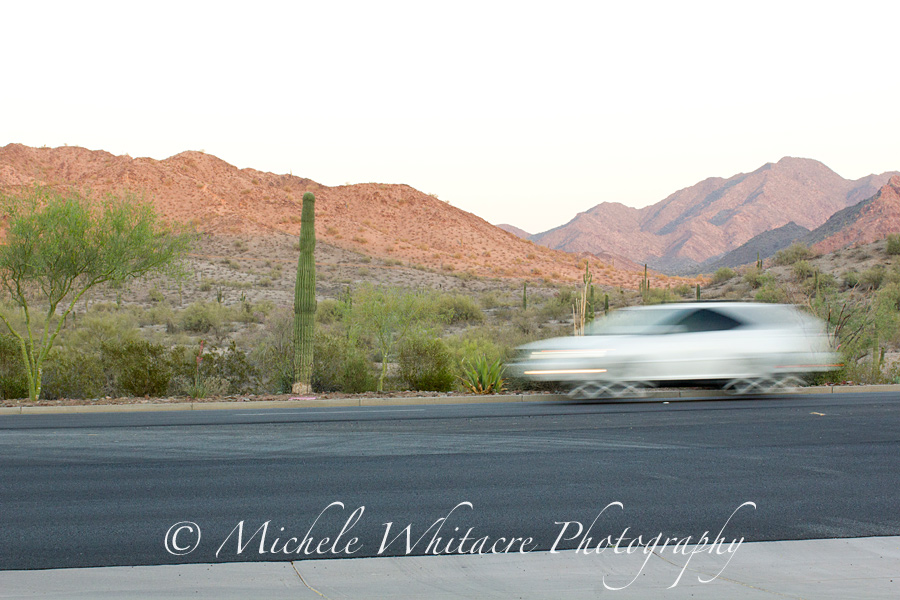
I would recommend spending some time with each of your lenses and practice changing the lens aperture size, the lens focal length, and the distance between your lens and your subject to get a feel for how all of these work to create depth of field in your photos.  Then join me back next week to learn about photographing motion.

Michele Whitacre is a portrait photographer serving Phoenix, Arizona and the surrounding area. Visit Michele's website at michelewhitacrephotography.com. Become a fan of Michele's work on Facebook. Follow Michele's updates on Twitter.