Just joining in? Here's what you've missed:
Photography 101 | Coming Soon!
Photography 101 | Aperture
Photography 101 | Shutter Speed
Photography 101 | ISO
Photography 101 | Exposure Meter
Photography 101 | Depth of Field
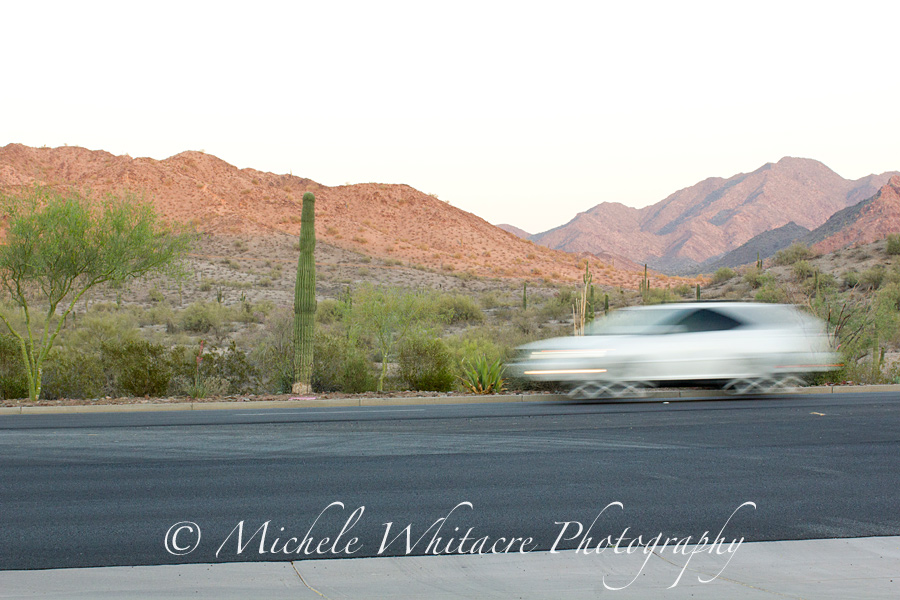
Photography 101 | Motion
Photography 101 | Think Like a Pro
Welcome back to my Photography 101 series! I'm so glad that you have decided to join me.
This week I am going to share some examples along with details about how I selected the settings for each of the photos. I'm hoping that this will help you to make a little more sense out of last week's post, Think Like a Pro. All of these are real life examples, where I created the photos under the given circumstances instead of making any attempts to stage the "perfect" shooting environment.
Example 1
For this first example, I decided that I wanted to take some motion shots of Zoe & Lexi. I was really hoping to take some fun photos of Lexi shaking water off of herself after playing in her pool but it didn't happen, which isn't much of a surprise. The first rule of photographing pets or children is be flexible!
To start with I took a photo of my scene, to help you see where I was shooting and the lighting conditions I had to consider. It is my backyard at about 11:30 AM, with the sun positioned almost directly above where I was standing to take this photo...

I took the above photo using my 18-55 mm lens at 18 mm. I opted to use this lens because it is the widest lens I own, and therefore would show the largest amount of the yard. The above photo was taken with the following settings: f/16 1/200 ISO 200. Here is how I came up with those settings: I evaluated my scene and nothing in it is in motion, so the first setting I considered was my aperture setting. I wanted my entire scene to be in focus, so I wanted a large depth of field. I thought that an aperture of f/16 would provide a large enough depth of field to keep the entire scene in focus, but also allow me to select a reasonably fast shutter speed so I could hand hold the camera with no risk of inducing any blur, and to keep my ISO in the range I like to shoot in with my camera. I then adjusted my shutter speed, while watching my exposure meter and ISO setting that the camera was automatically adjusting for me. When the exposure meter read a proper exposure at 1/200 and ISO 200, I knew that would work for this photo.
Could I have picked different settings? Yes! For every photograph, there are multiple combinations of settings that will result in a properly exposed image. I could have closed down the aperture a stop or two, and compensated by slowing the shutter speed by an equivalent adjustment and still captured the same image. I probably could have opened up the aperture slightly, and increased the shutter speed as well, but if I opened up the aperture too much it would have affected the depth of field and resulted in the background of the photo becoming blurry.
OK, now on to the photos that I took in the above scene. I decided that I wanted to use my 24-70 mm lens for these photos. I picked a zoom lens because I wanted the flexibility to be able to change the focal length of my lens as the dogs were in motion. Both of the photos below were taken with the following settings: f/3.2 1/2000 ISO 100. Here is how I came up with the settings: I knew that I was going to be photographing the dogs in motion, and I wanted to show the motion by freezing it, therefore, I needed a fast shutter speed. I knew I could have selected a speed that was slower, like 1/500 or 1/1000, and still frozen the motion in the photos. However, I also knew that I wanted a fairly narrow depth of field because I wanted to blur out whatever ended up in the background as much as possible. So, I thought 1/2000 would freeze the motion, while allowing me to use the aperture setting I wanted to use. I opted for f/3.2 because it would give a narrow depth of field which would blur out a lot of the background and help to isolate my subject(s), yet wide enough that I thought I could still manage to capture the dogs as they were racing around. After picking my first two settings, the camera had automatically adjusted the ISO to 100 for a proper exposure.


Example 2
This second example was taken while I was attending a law school function with my husband. I was sitting across the table, watching the amazing light pouring in from the windows behind me, and asked Jeff if he would be nice enough to allow me to take a few photos of him. He agreed, so I captured a few candid images of him while he was conversing with the others at the table.
To start with I took a photo of my scene, to help you see where I was shooting and the lighting conditions I had to consider. This is inside of a restaurant at about 4:30 PM. I was sitting at the table directly across from my subject, and the entire wall behind me was windows...

I took the above photo using my 18-55 mm lens at 24 mm. I opted to use this lens because it is the widest lens I own, and therefore would show the largest amount of the scene. The above photo was taken with the following settings: f/5.6 1/100 ISO 100. Here is how I came up with those settings: I evaluated my scene and nothing in it is in motion (or at least not in much motion - yes Jeff was moving a little as he was talking but he wasn't exactly racing around the table or anything), so the first setting I considered was my aperture setting. I wanted enough of the scene to be in focus to show what was behind my subject, but the wall and the door were only about 3-4 feet behind Jeff. I knew an aperture of f/5.6 would provide enough depth of field for the scene I was working with, and allow me to select a shutter speed that would allow me to hand hold the camera with no risk of inducing any blur. I then adjusted my shutter speed, while watching my exposure meter and ISO setting that the camera was automatically adjusting for me. When the exposure meter read a proper exposure at 1/100 and ISO 100, I knew that would work for this photo.
OK, now on to the photo I took in the above scene. The photo below was taken with my 50 mm lens, which I selected because it opens up to a wider aperture than any of my other lenses. With that crazy wall as my background, I knew I wanted to narrow my depth of field in order to blur that wall as much as possible in an attempt to isolate my subject from it. So, I opted for an aperture setting of f/1.2. I then adjusted shutter speed while watching my exposure meter and ISO setting that the camera was automatically adjusting for me. When the exposure meter read a proper exposure at 1/250 and ISO 100, I knew those settings would work for the photo I wanted to create.

Again, I know that is a lot to take in! So, I'm going to leave you with these two examples and next week I will return with another example or two taken in different lighting conditions.
Michele Whitacre is a portrait photographer serving Phoenix, Arizona and the surrounding area. Visit Michele's website at michelewhitacrephotography.com. Become a fan of Michele's work on Facebook. Follow Michele's updates on Twitter.